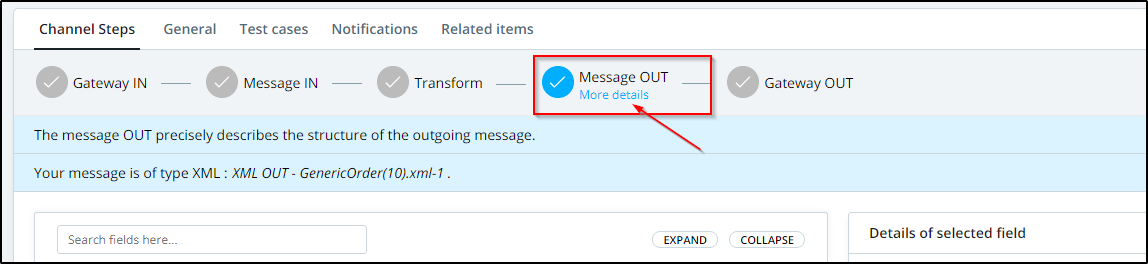
How to reach Extra Processing
Click on "More details" in the Message OUT as shown:
Now you can reach the Extra Processing as shown:
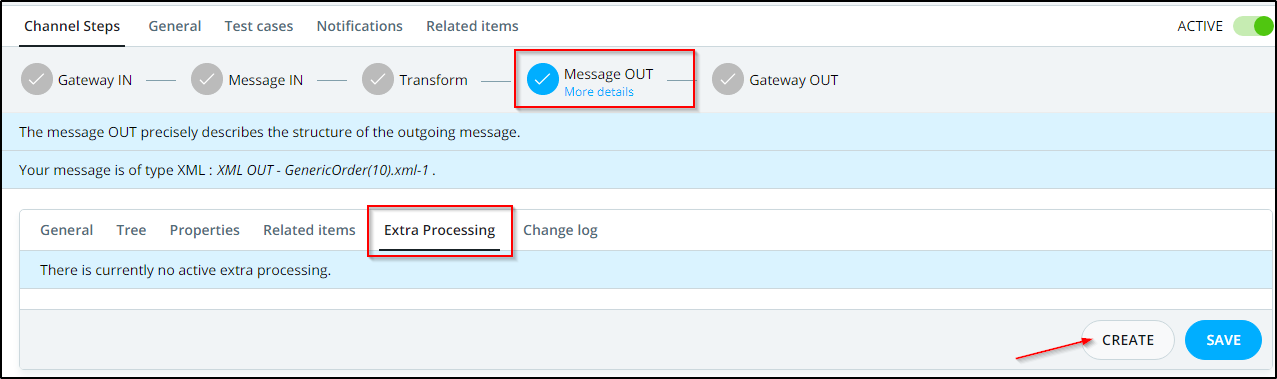
Extra Processing
Xslt transformer
Applies an xslt to correct your message. It is applied on the internal xml representation of the message (before the message is converted to the output format).
Be aware that the output of your transformation must be compatible with the internal representation of Babelway for this message format.
The parameters are :
Allows you to extract any information in the output message to be able to view it directly in the monitor page.
As an example, suppose that you want to extract some information from the output message to be able to view it directly in the monitor page.
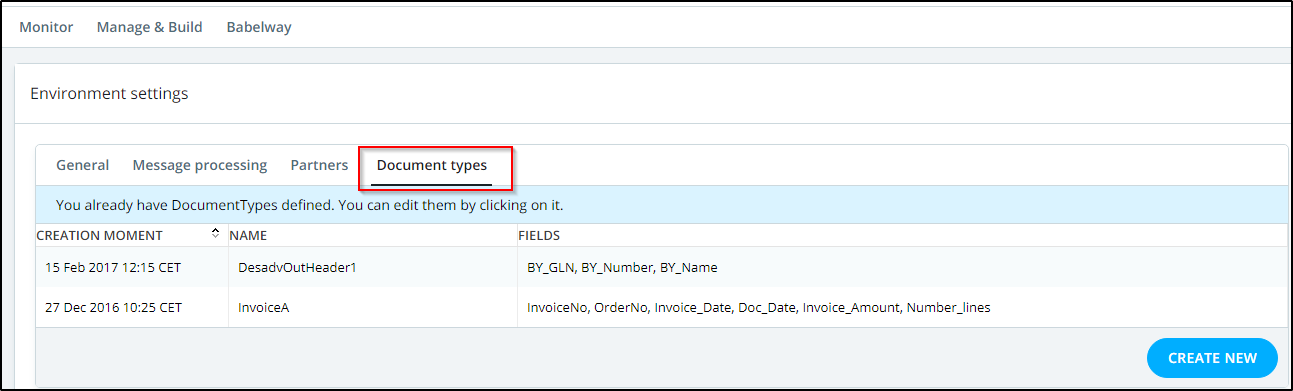
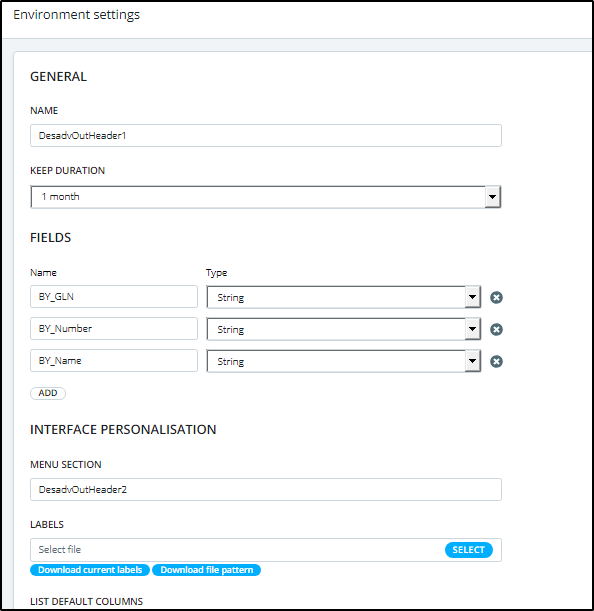
First, create the "Document type" you want to use from "Admin / Environment settings / Document types".
Based on the information you want to store, you will need to create its corresponding document type, as shown below.
Note: For more information about the Document types you can check this link Document types.
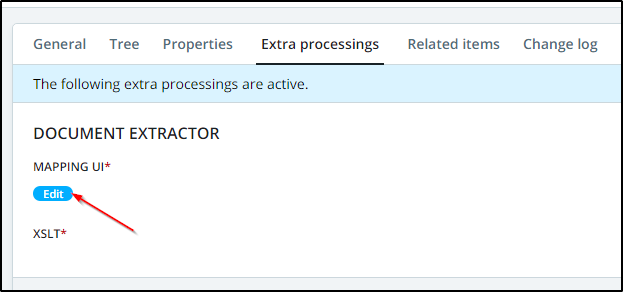
Then, create this extra processing in the "Message Out" and after that click on "Edit" to map the fields you want to extract, as shown below.
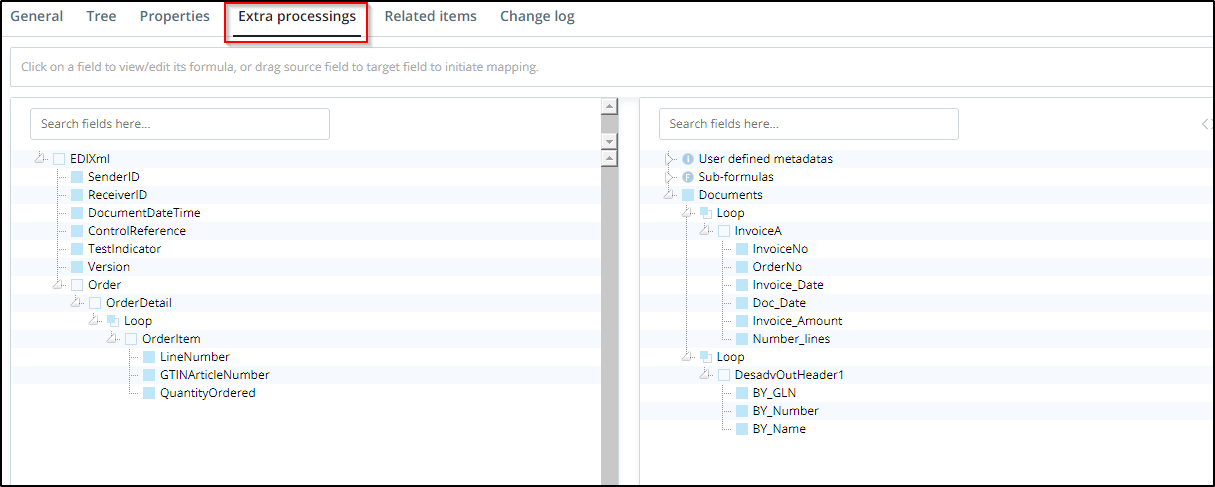
After that, begin mapping the fields from the input message you want to extract to the fields in this document type, as shown below.
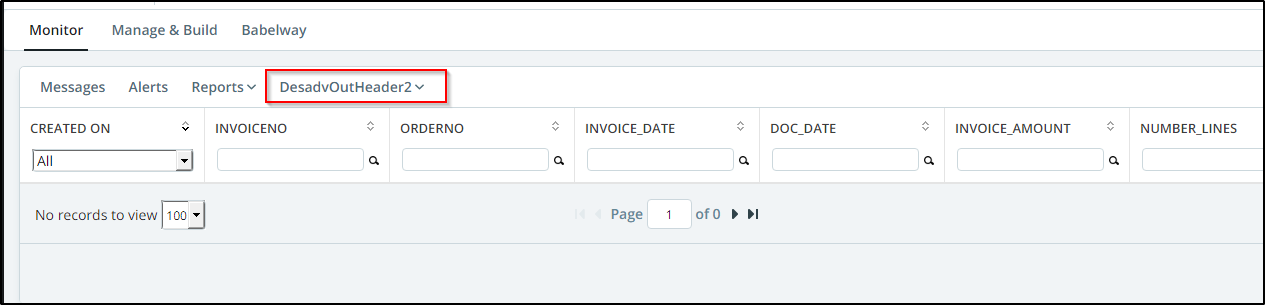
To be able to view the extracted information, go to monitoring and then based on the "name of the document you used" ("orders" in this case), click on it to view the extracted information, as shown below.
Note: In order for the new document type to be displayed in the Monitoring page after using it in it's corresponding channel or channels you will need to deploy your environment in order to push this changes to production and the new document will be displayed in the Monitoring page, as shown below.
Converts all line delimiters to the line delimiter that you choose. The original file can have its line delimiters in any style (Unix, Windows, Mac).
The parameters are:
Note: The line delimiter for Unix / OSX is \n, The line delimiter for Windows is \r\n, The line delimiter for Mac is \r.
Signs an Xml.
The parameters are:
Alias of the key (in your keystore) that will be used to sign the Xml. |
|
The digest method that will be used during the signature of the Xml. |
|
The signature method that will be used to sign the Xml. |
|
|
The transformation that will be used to sign the Xml. You have the choice between an inclusive Canonicalization or an enveloped signature. |
|
The Xpath that will allow the extraction of the URI of the root node of the subtree that needs to be signed. If not defined, the whole xml document will be signed. |
Allows you to create a pdf that will contain your output file in attachment.
The parameters are:
|
The template that will be used to create and contain the pdf. There are 4 possibilities:
|
|
The name of the metadata containing the pdf. This metadata must have been populated earlier in the process of the message, for instance by extracting it from a zip file. |
|
The name that your output file will have in the pdf. |
|
The description that your output file will have in the pdf. |
|
Other files that must be added to the pdf. For each individual file, you will have to state the name that the file will have in the pdf, and the name of the metadata that contains the content. |
Allows you to resize an output pdf.
The parameters are:
The page size requested for the new pdf (A4, A5, LETTER, ...). The default is A4. |
|
Specifies the zone in the input pdf that will be copied to the output pdf. The default is 0. |
|
Specifies the zone in the input pdf that will be copied to the output pdf. The default is 0. |
|
Specifies where the zone copied from the input pdf will be placed on the page in the output pdf. |
|
Specifies where the zone copied from the input pdf will be placed on the page in the output pdf. |
|
Specifies the zoom ratio that must be applied when copying requested zones from the input to the output pdf. The default is 1. |
|
Specifies the zoom ratio that must be applied when copying requested zones from the input to the output pdf. The default is 1. |
Allows you to set a letterhead to your output pdf file.
The parameters are:
The pdf file that contains the letterhead. |
|
|
When the letterhead pdf contains multiple pages, it tells you which page of the letterhead must be used for every page of the output pdf file. The possible values are described hereafter. For every value, we also show as an example the result of the association for an output pdf file that would contain 5 pages (1, 2, 3, 4 and 5) and a letterhead pdf that would contain 2 pages (A, B).
|
Allows you to add extra pages to your output pdf file.
The parameters are:
Allows you to add attachments to your output pdf file.
The parameters are:
Allows you to sign your output pdf file.
The parameters are:
Alias of the key (in your keystore) that will be used to sign the pdf. |
|
The password of your pdf (if your pdf is secured by a password). |
|
Text that will be associated to the signature. |
|
Allows you to add an image to your pdf to show the signature. |
|
Position (lower left X) where the signature image will be displayed. Only if you choose to show the signature. |
|
Position (lower left Y) where the signature image will be displayed. Only if you choose to show the signature. |
|
Position (upper right X) where the signature image will be displayed. Only if you choose to show the signature. |
|
Position (upper right Y) where the signature image will be displayed. Only if you choose to show the signature. |
|
Image used to show the signature. Only if you choose to show the signature. |
|
Allows you to timestamp your output pdf. |
|
If you choose the external as timestamp method, the url to be called for the timestamping. |
|
If you choose the external as timestamp method, the optional login to use for the call. |
|
If you choose the external as timestamp method, the optional password to use for the call. |
Allows you to wrap your output file from a zip. It also allows you to add other files in the zip.
The parameters are:
The name that your output file will have in the zip. |
|
Other files that must be added to the zip. Metadata = Pattern to match the metadata containing the file to attach. Filename = name of the file in the zip. If one pattern matches multiple files, it is possible to put them all, if you guarantee to generate a different filename name for each one. This can be achieved by using the capturing groups of the regex in the filename. Ex: if your metadata pattern is attachment-(.*) and your filename is \1, processing with two metadata attachment-file1.csv and attachment-file2.csv will result in files, file1.csv and file2.csv. |
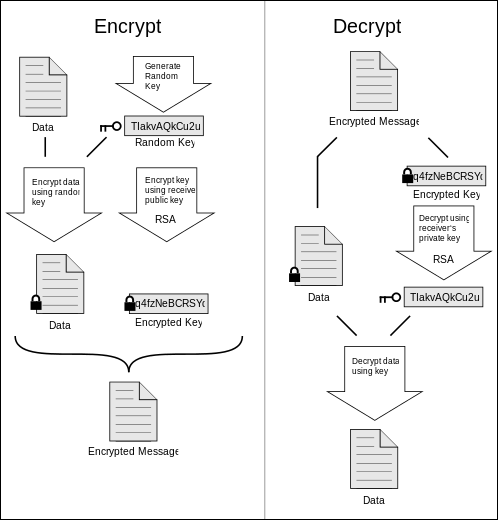
Allows you to encrypt a file using PGP.
PGP supports message authentication and integrity checking. The latter is used to detect whether a message has been altered since it was completed (the message integrity property) and the former to determine whether it was actually sent by the person or entity claimed to be the sender (a digital signature). Because the content is encrypted, any changes in the message will result in failure of the decryption with the appropriate key. The sender uses PGP to create a digital signature for the message with either the RSA or DSA algorithms. To do so, PGP computes a hash (also called a message digest) from the plaintext and then creates the digital signature from that hash using the sender's private key.
The parameters are:
Public key to be used to encrypt the message. Babelway supports RSA and El Gamal encryption keys. |
|
|
If checked, the PGP output follows the Ascii armored format. If not, the output is in binary. ASCII armored format is a binary-to-textual encoding converter. ASCII armored format is a feature of a type of encryption called pretty good privacy (PGP). ASCII armor involves encasing encrypted messaging in ASCII so that they can be sent in a standard messaging format such as email. |
Allows you to wrap your output message in a MIME envelop.
The parameters are:
The name that your output file will have in the MIME envelop. |
|
The content type that will be associated to your output file in the MIME envelop. |
|
Other files that must be added to the MIME envelope. Metadata = Pattern to match the metadata containing the file to attach. Filename = name of the attachment in the MIME envelope. If one pattern matches multiple files, it is possible to put them all, if you guarantee to generate a different filename name for each one. This can be achieved by using the capturing groups of the regex in the filename. Ex: if your metadata pattern is attachment-(.*) and your filename is \1, processing with two metadata attachment-file1.csv and attachment-file2.csv will result in files, file1.csv and file2.csv. |
|
Sign the generated MIME envelope. |
|
The alias of the key (in the keystore of your environment) that will be used to generate the signature. |
|
Encrypt the generated MIME envelope whether it is signed or not. |
|
The alias (in the keystore of your environment) of your partner's certificate. It will be used to crypt the S/MIME message. |
Allows you to make a global search and apply regular-expression replacements on your output file.
You can define more than one pair of regular-expressions, find & replace pattern.
The parameters are:
Allows you to create new messages, with content from current metadata.
The parameters are:
The gateways to which the new message will be sent. |
|
Metadata containing content for messages to create. Metadata = Pattern to match the metadata that contains the contents for new messages. Filename = fileName of the new messages. If one pattern matches multiple metadata, a new message will be generated for each metadata. You can use the capturing groups of the regex in the filename. E.g.: if your metadata pattern is attachment-(.*) and your filename is \1, processing with two metadata attachment-file1.csv and attachment-file2.csv will result 2 new messages files file1.csv and file2.csv. |
|
The strategy that will be used to transfer the user metadata to the new message created in the connected gateways. |
Note:
- This extra processing is not executed while running a test case.
- In Babelway, we're using the standard Java version of REGEX, and it's the same used all over the system.
Allow you to validate a message against a metadata.
The parameters are:
Create an error if the message is not valid. |
|
If 'Fail on error' is not selected, this puts the message in error without creating a ticket. |
|
Name of the metadata containing the expected result. |
|
List of regular expressions to ignore. |
|
List of date format expressions to ignore. Dates are expressed using the regular java format like : yyyyMMddhhmmss. |
This extra-processing allows to define criteria to automatically close an error that occurs during the message definition OUT step.
The parameters are :