Automatic Population of Lookup table allows you to import the lookup table data from outside data source.
After creation of a lookup table you can create a data import channel by clicking on Create a channel to import data in the table as illustrated below: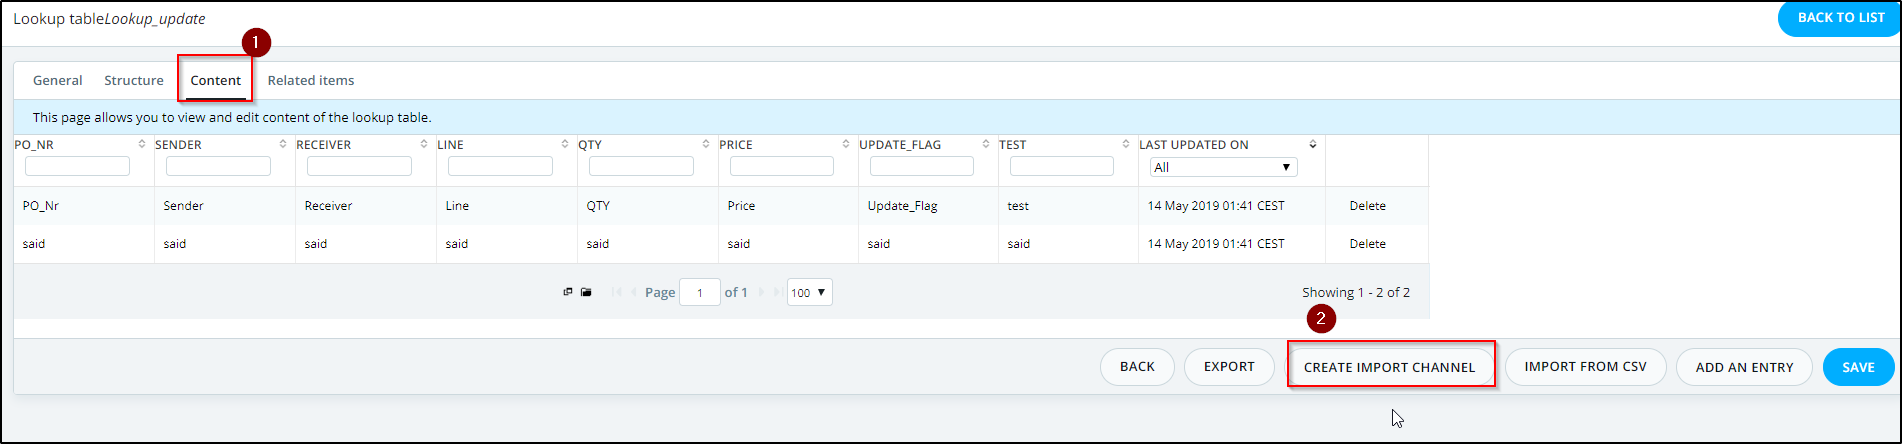
Create a lookup table data import Channel
This will automatically create a data import channel in your account with predefined gateways and message definitions.
You can upload your CSV file directly from the created web gateway like the following example or you can modify the channel to meet your requirements.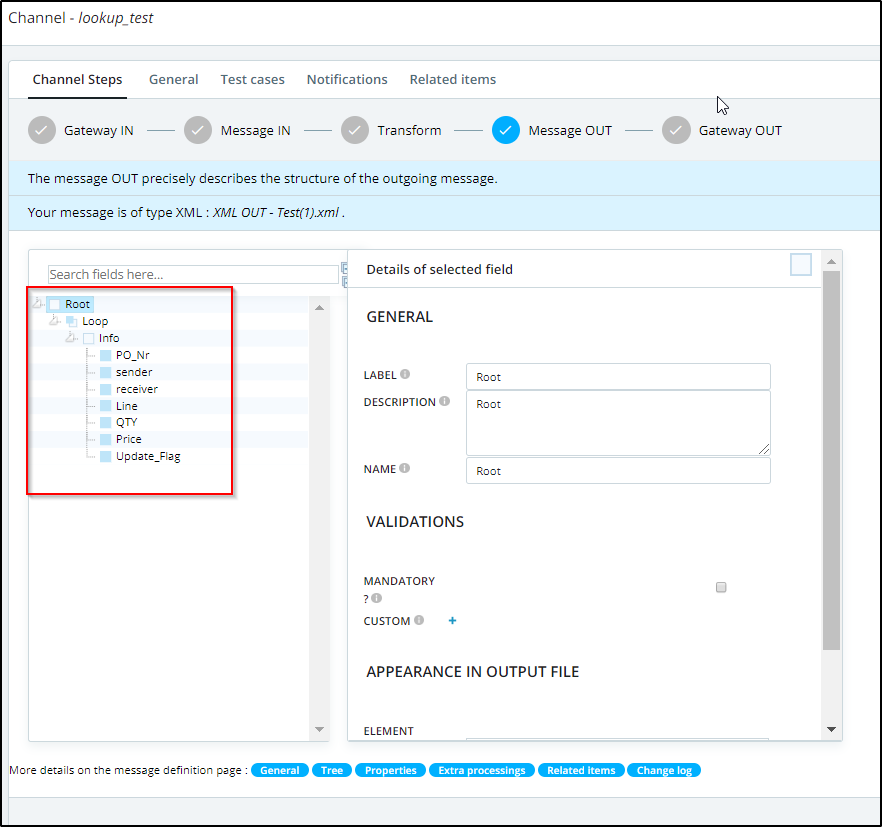
Lookup Tables Data Import Channel
In this example we have two fields (counterName and value).
Below, please find the CSV file:
1,1001
2,1002
3,1003
4,1004
How to create a "Message Out" of type XML to use it in the lookup table.
1- Go to the "Message Out" and create Message Out of type XML using the below XML sample: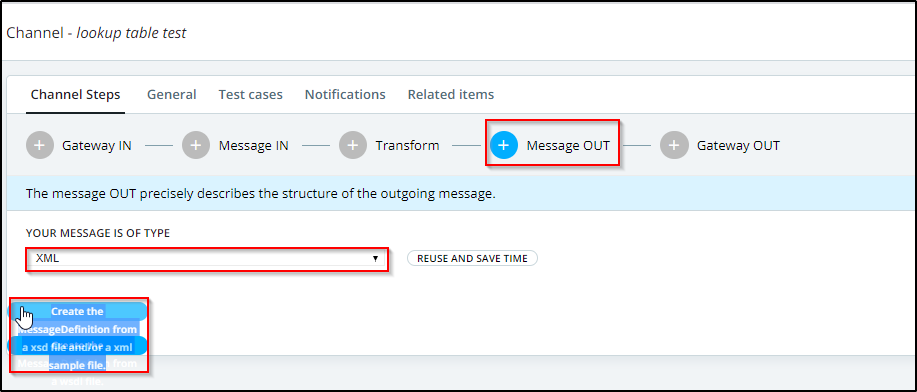
Create the Message Out for the lookup table channel
Note: Below is the XML sample file:
<?xml version="1.0" encoding="UTF-8"?>
<csv xmlns="http://xmlns.babelway.com/2007/message-format/csv">
<line>
<field>a</field>
<field>b</field>
<field>c</field>
<field>d</field>
<field>e</field>
<field>f</field>
<field>g</field>
<field>h</field>
<field>i</field>
<field>j</field>
</line>
</csv>
2- Select the Loop node and remove it by clicking on "Remove this loop".
Remove the Loop under the line node
3- Select "line" node and click on "Create loop" to create a loop node above the "Line" node. This will allow to create multiple lines in the output message.
Create a Loop above the line node
4- Select the "field" node and duplicate it nine times by clicking on "Duplicate".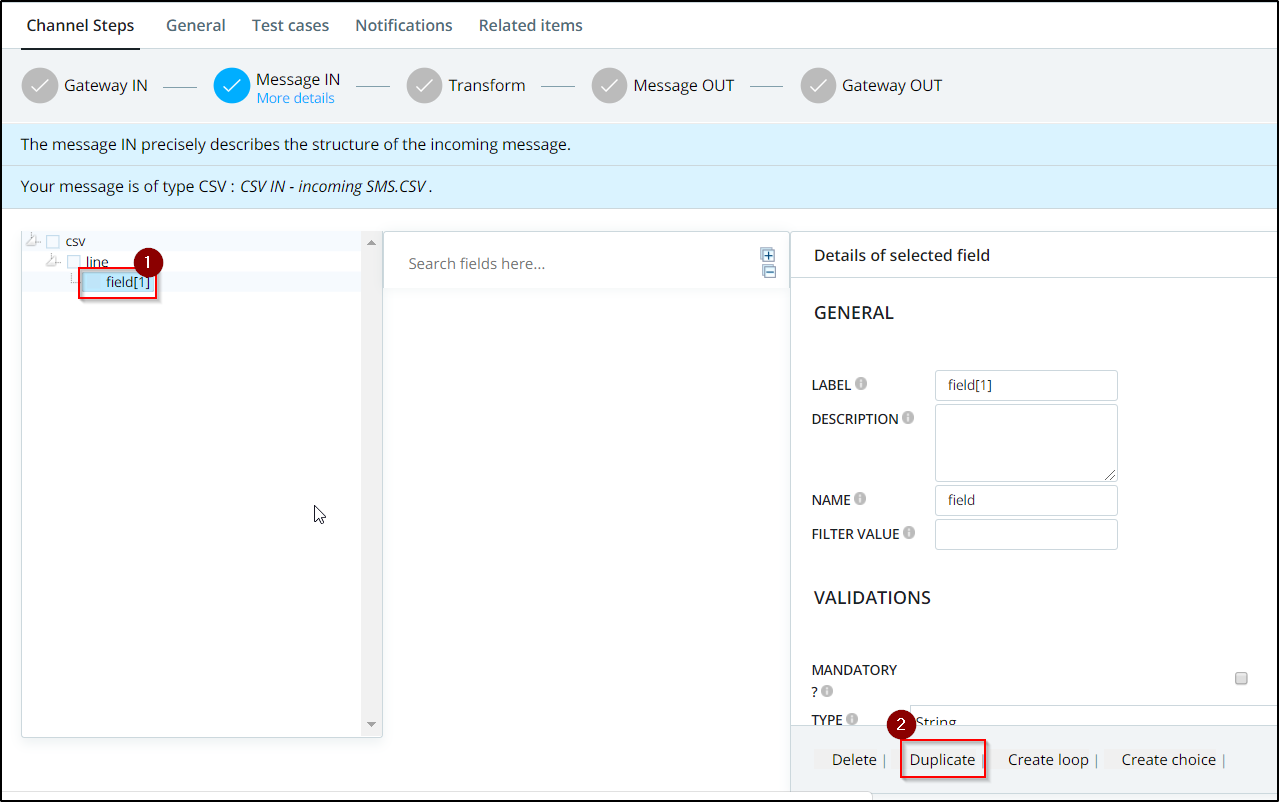
Duplicate the field node
5- Select the "field" node and change its "Label" to "code" in this example. The code is the name of the first column of the lookup table.
Rename the field node
Note: It is not mandatory to change all the "field" node's labels but this will make it easy when mapping the "Message In" to the "Message Out" in the transformation.